Factory of Heroes
Manual
Hello, welcome to the FH Manual. This manual is divided into parts to facilitate the search for program features. If you've never used FH, I recommend starting with the basics and then moving on to the more complex steps.
- 1 - Básics
- 2 - Extra Features for Items
- 3 - Changing Physical
- 4 - Modify Menu
- 4.1 - Modification Fields
- 4.2 - Invert Items
- 4.3 - Copy Values
- 4.4 - Sort the Items
- 4.5 - Masking Items
- 5 - Coloring Menu
- 6 - Tools Menu
- 7 - Shortcut List
- 8 - Insert External Images
1 - Basic - Insert, modify and color items
The FH is a rather complex character creation tool, it may take some time to get used to all the buttons, menus and features, so let's start with the basics so you can get the hang of it and evolve your creations.
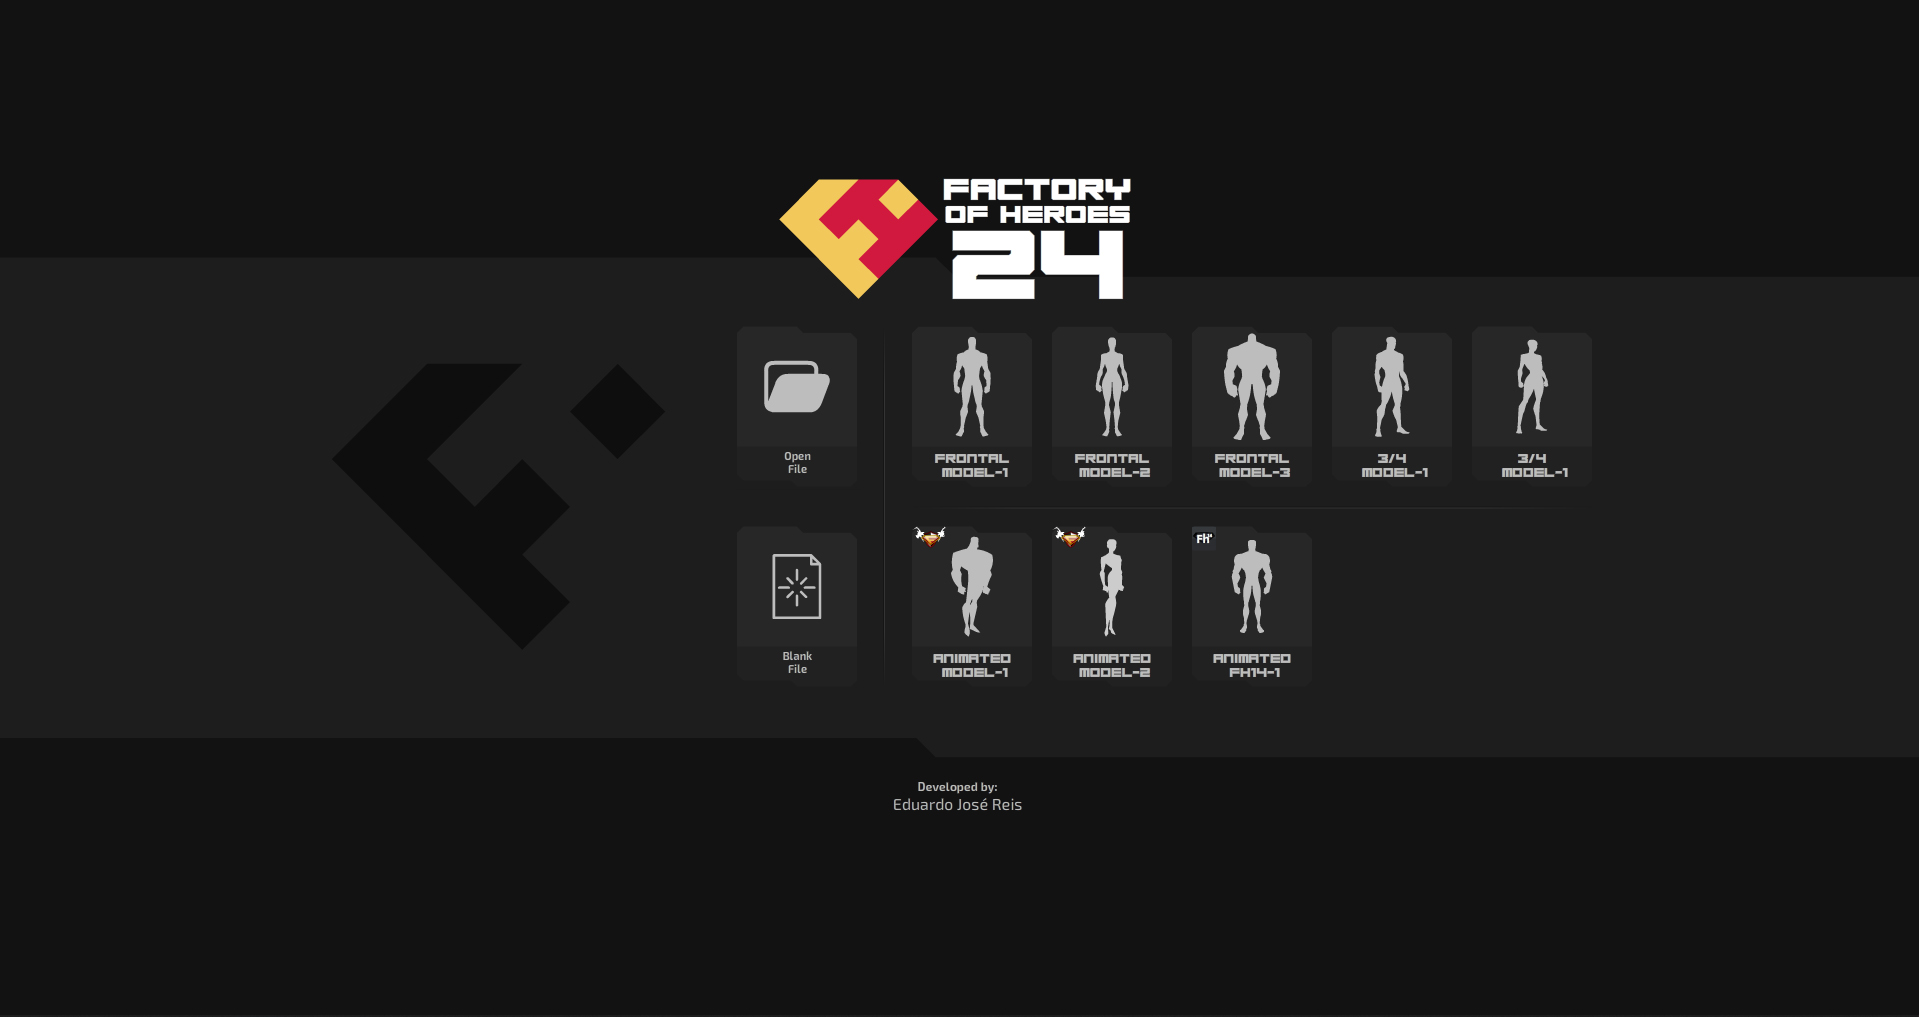
The following image is the program's homepage. Here you can choose to start the creation with a blank page or with a predefined template, you can also open a previously saved file. With one click the program will take you to the creation area.
You will be directed to the program as shown in the following image. This is the FH creation stage, the blank sheet where you will create your characters:
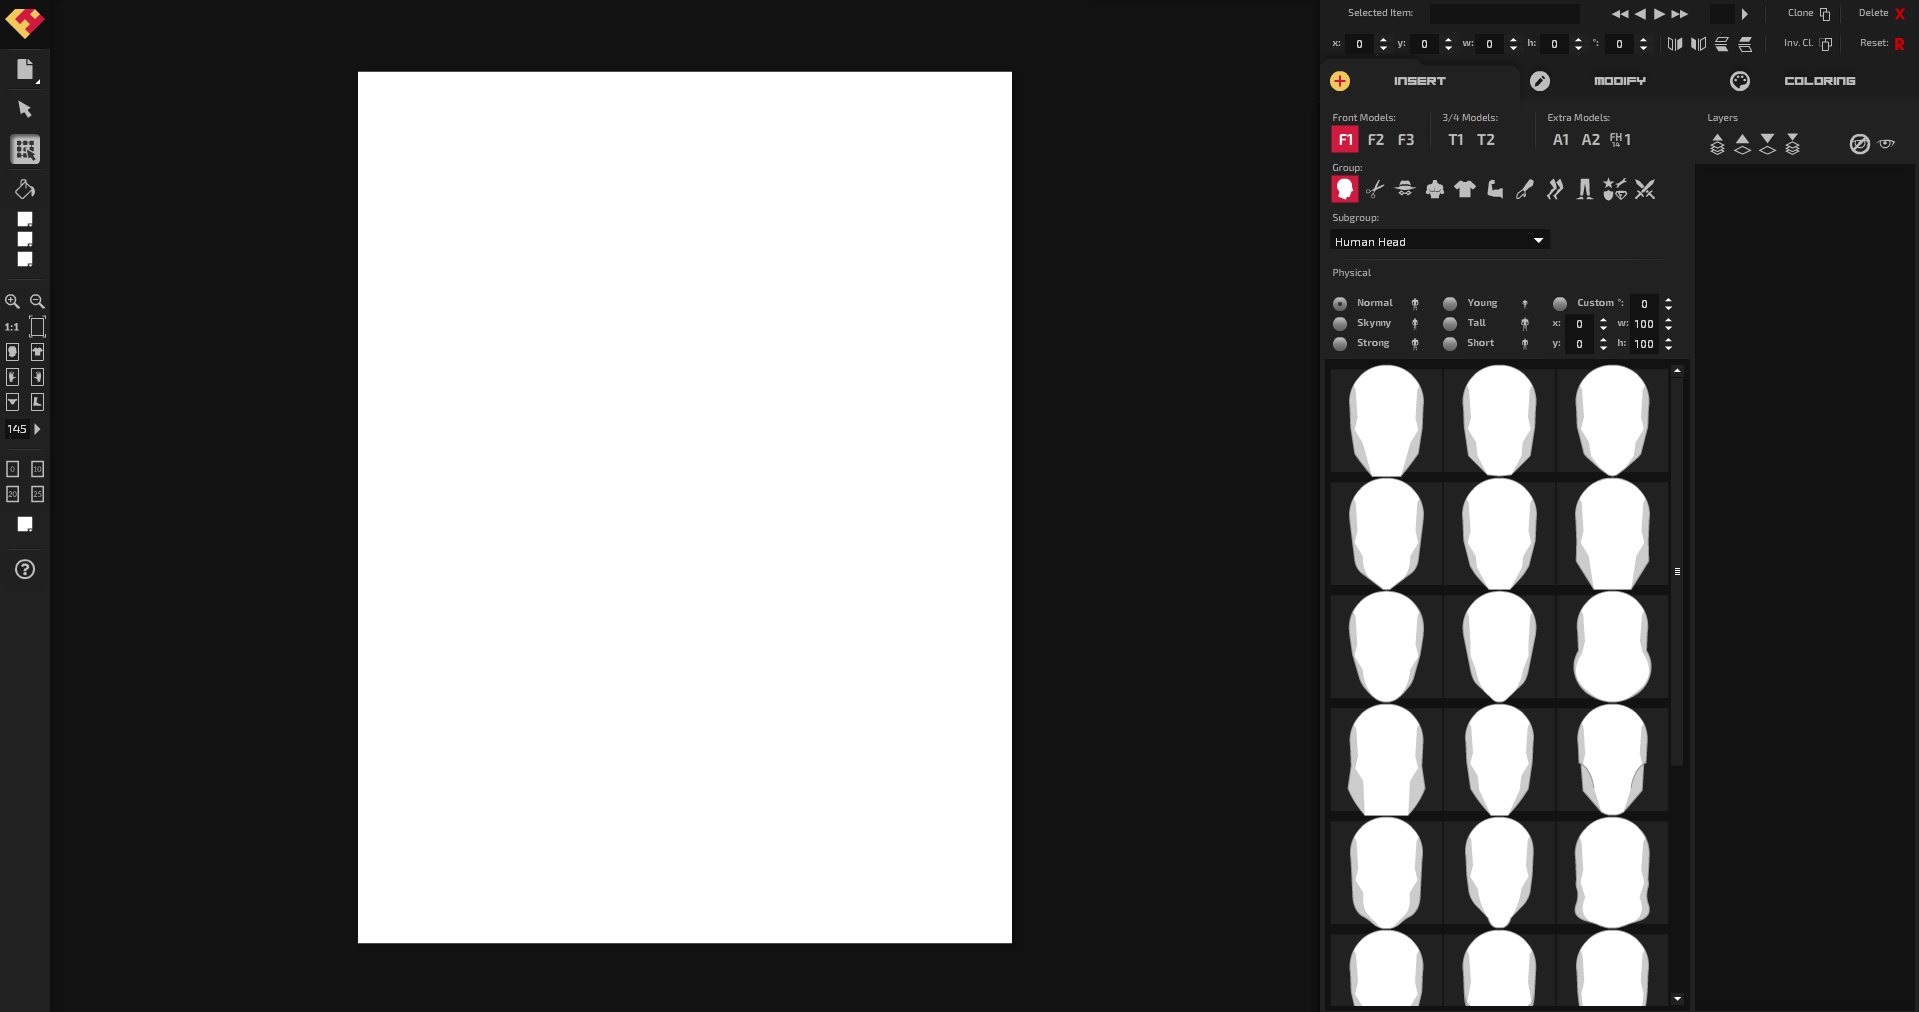
Let's start with the basics, the first step is inserting items. On the right we have the Insert Menu. That's where everything for you to create your character will come from, such as heads, shirts, weapons and even special powers. All these separate parts we call "Items".
1.1 Insert Items
Items are grouped into Models, Groups and Subgroups, they are groupings of separate items to facilitate their creation. Using the buttons you can select the specific group to find the item you want to insert, for example: by selecting Head you will have access to all types of this group, such as bird, tiger, horse heads , etc.
Once the subgroup is selected, the item preview menu will be updated and will load all items referring to the selected group. By default FH will show you all items in the "Head" group and "Human Head" subgroup.
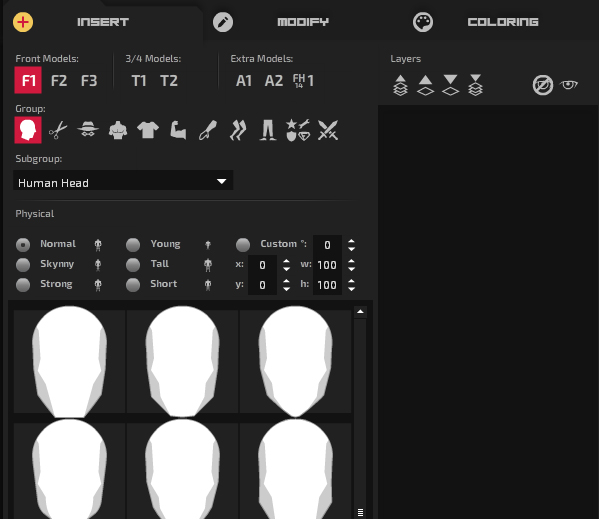
You can use the scroll bar to see all available items in that subgroup. We suggest waiting for all items to load before you can change the Item group or subgroup. With the Item subgroup already chosen, select your item. To insert on stage, double-click on it.
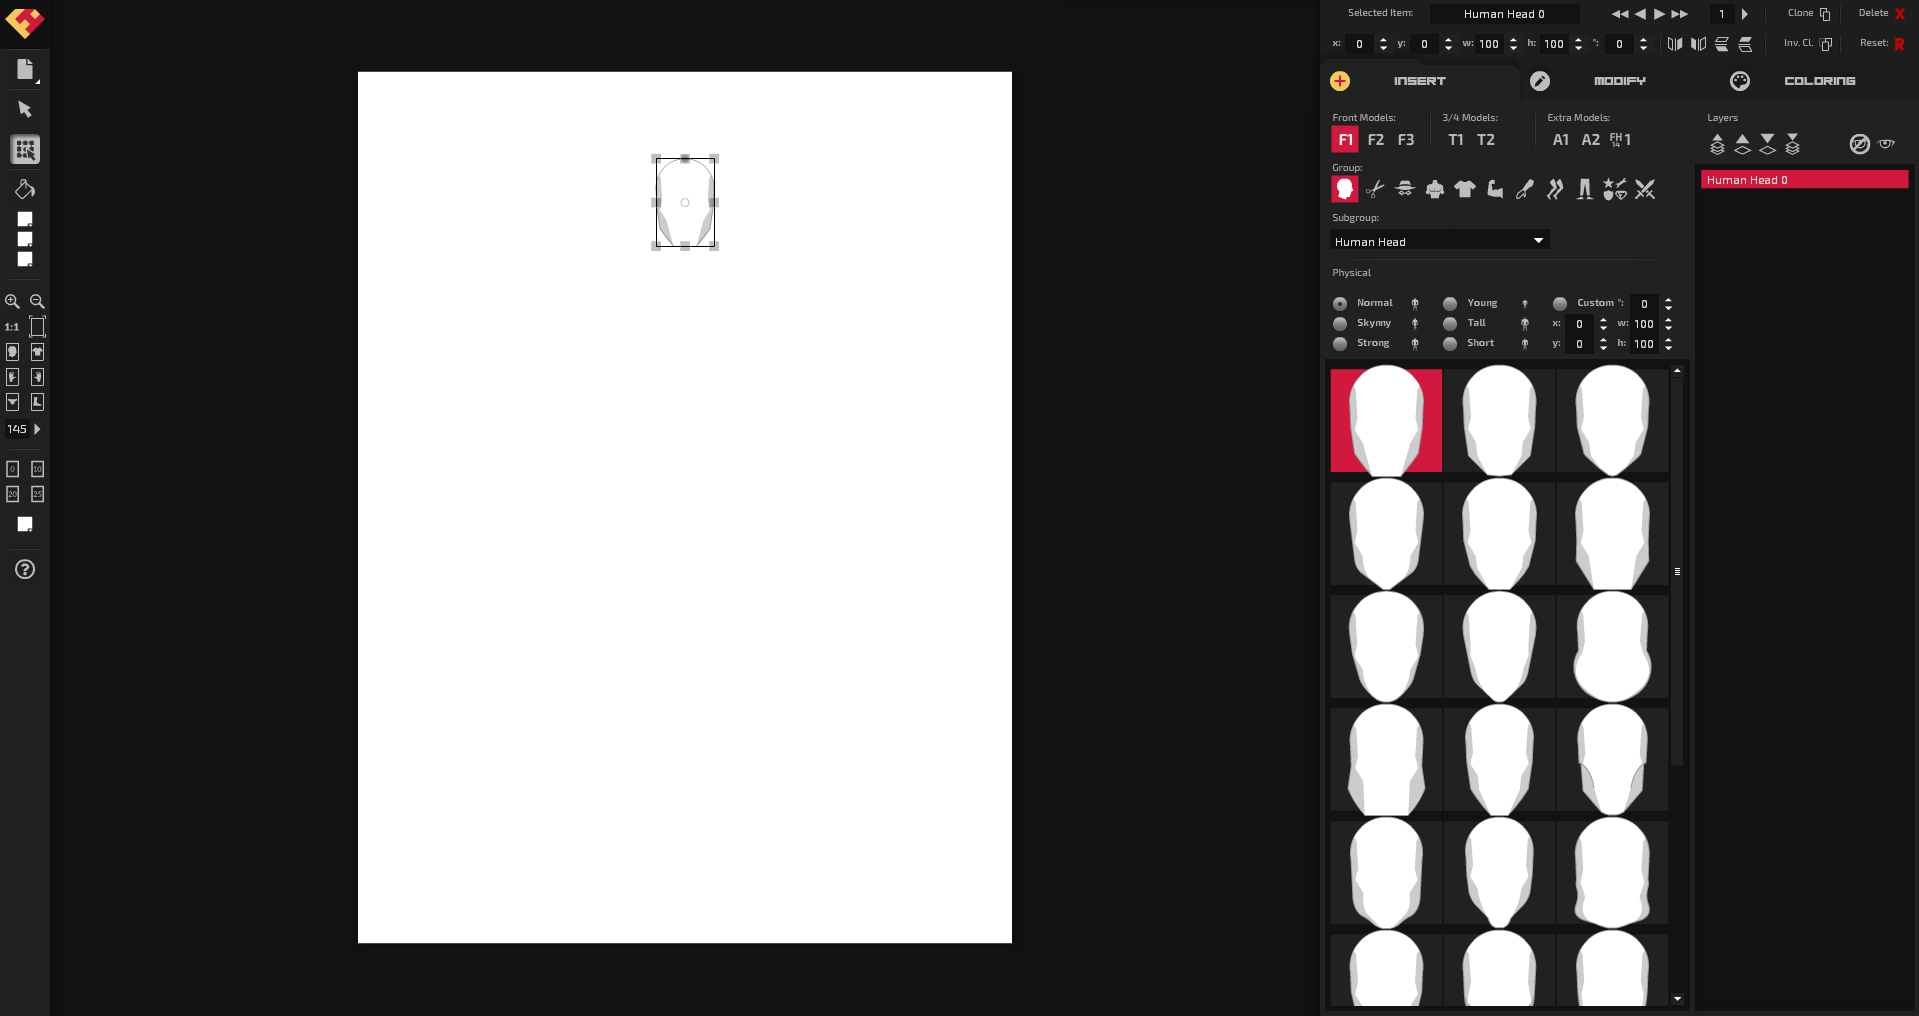
Okay, with the double-click your selected item will be on the stage, in my example above, I inserted a common head.
Note that as soon as your item is inserted there will be a selection indication for that item and some squares around it. This is indicative that this is the item that is Selected. Any changes you make in the other menus will take effect on this selected item. Each item has a name once it is entered, the item name will also appear in this field when it is selected:

The item name can be changed, double click on the Selected Item field, change the item name and confirm with the "Enter" key.
You can insert as many items as you want (until your PC can handle it), just by selecting the insert menu, in the item preview, and double-clicking on the chosen item. To deselect the item, just click on the blank area of the stage and to select it again, just click on it.
1.2 Modify Items
With your item selected we go to the second part of the basics which is to Modify the items. You can basically modify your item in two ways, using the Modify Menu on the right or using the modification handles that surround the item once selected.
When clicking on the Modify Tab, the menu on the right will change to the item modification controls as you can see in the following image:
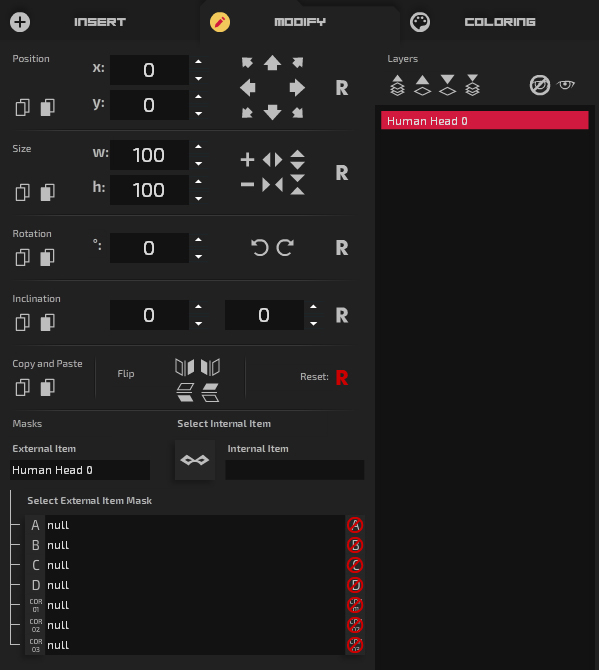
These are the controls for Move, Resize (increase or decrease), Rotate and Skew your item. Click to modify your item (remember to leave it selected for this), you can do it through the specific buttons for each type of modification or use the numeric fields to make the changes. The "R" buttons will reset your item to its initial position, size, rotation and skew. The rest of the features, we will see later.
We can also change the item through the modification handles that are around the selected item. To move, just click and drag your item around the stage. To resize, rotate or skew, you need to move the mouse pointer to one of the handles until one of these symbols appears:
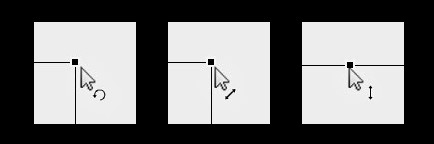
Then just click and drag to modify your item, resizing, rotating or skewing.
1.3 Coloring Items
To finish the basics, it's time to color our items. To do this, click on the Coloring tab.
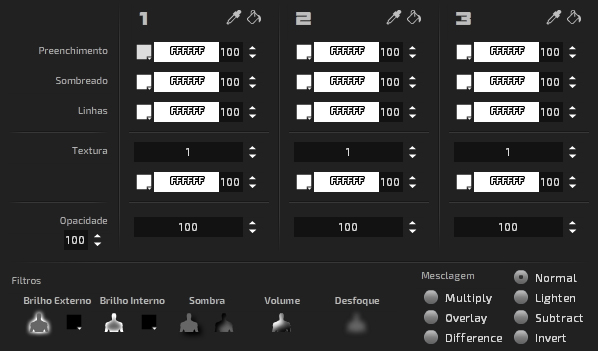
For the basics we will only use these color controls:
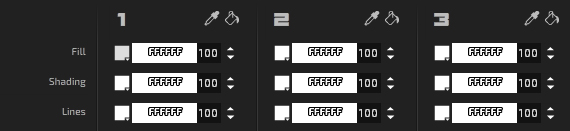
With them it will be possible to color without problems, just that the item is selected. For that, I'll use this gorilla head as an example:
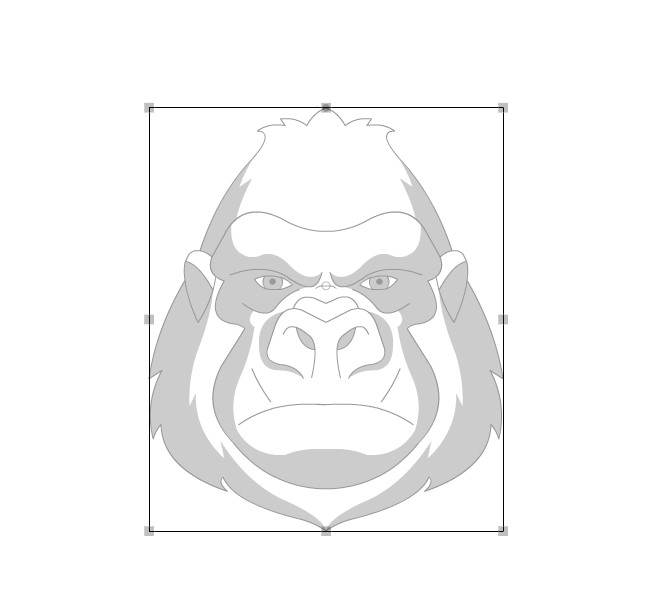
With the item selected, click on the control just below the number 1. Once clicked, the control will open a color palette so you can select the one you like the most.
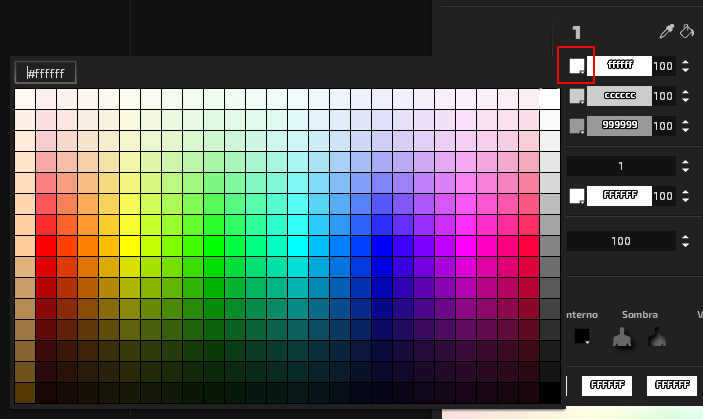
Click on one of them and see your item gain its color.
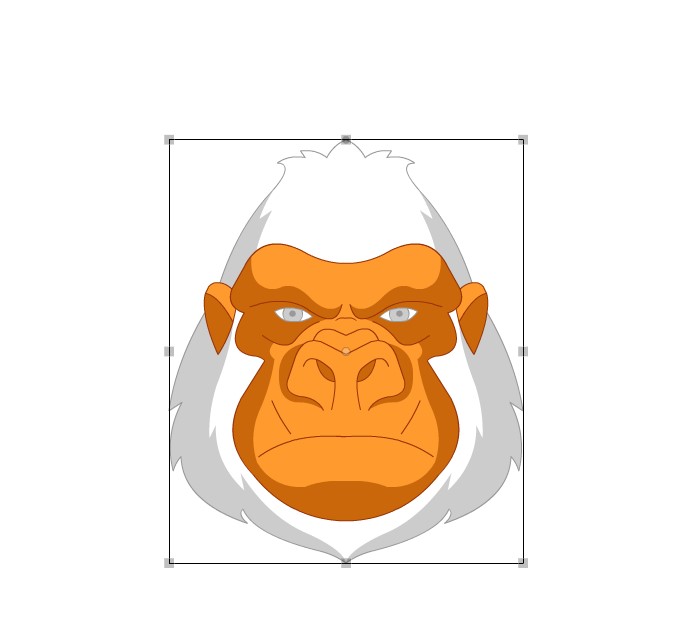
Here, I added an orange color to the face of the gorilla that was placed on the stage, but only in a part, as this part is related to the Color 1 of the item. Items can have up to 3 different color areas, so you can understand better, I painted each one a different color:
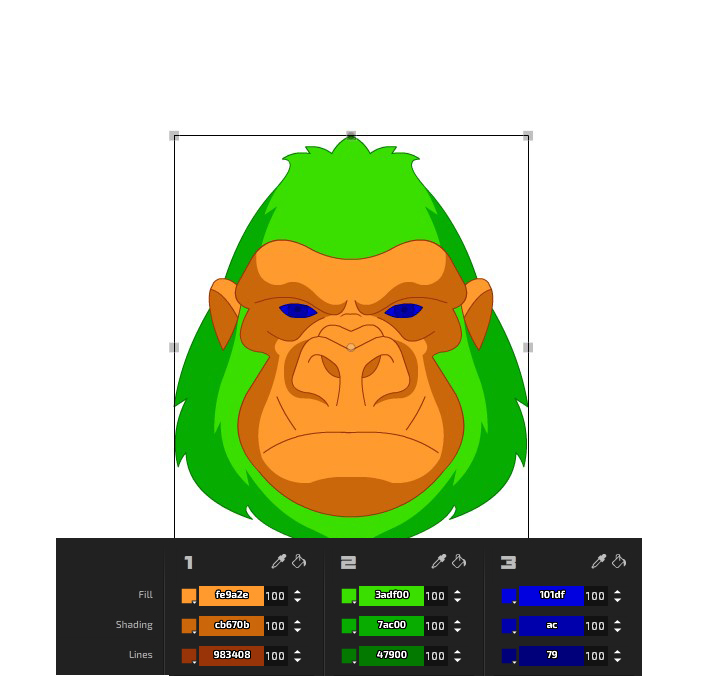
By default, FH already paints the Line and the Shading according to the color selected for the Fill, but you are free to select another color that you like better.
You can also type the color value in the palette field on the side and press Enter, this will make the item color the desired color. Here you can find a multitude of color codes to use. Remember that it is not necessary to enter the "#" to use the desired color.
This is the basics of creation: inserting, modifying and painting. Next we will teach you some more features, I suggest testing these first steps again before moving on to the next one.
2 - Extra Features for Items
Above the menu tabs right after the "Selected item" field there are some extra commands for the items, let's see one by one:
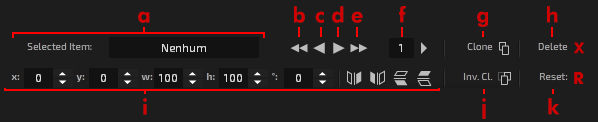
- a. Selected Item Field: Where the user can view and change the name of the selected item. All changes will be made to the selected item;
- b. First Item: By clicking this button the selected item will change to the first item in the list of subgroups to which it belongs;
- c. Previous Item: By clicking this button the selected item will change to the previous item in the list of subgroups to which it belongs;
- d. Next Item: Clicking this button will change the selected item to the next item in the list of subgroups to which it belongs;
- e. Last Item: Clicking this button will change the selected item to the last item in the list of subgroups to which it belongs;
- f. Item Number: This field indicates the item number in the subgroup to which it belongs, when typing a number and clicking on the right arrow, the selected item will change to the item referring to the number in the field;
- g. Clone Item: By clicking on this button, the selected item will be cloned, inserting on the stage an item identical to the selected one, with the same position, size and colors;
- h. Delete Item: Clicking this button will delete the selected item from the stage.
- i. Position, Dimension, Rotation properties of the selected item, in addition to buttons to invert and reverse;
- h. Clone Inverted: By clicking this button the selected item will be cloned, but inverted horizontally.
- h. Reset Item: Clicking this button will reset the selected item to its original position, dimension and rotation.
3 - Changing Physical
In the Insert Menu there is a section called "Physical":
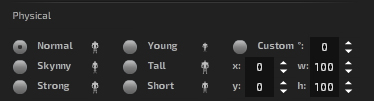
Sometimes you want to make a character that is a little taller than the standard Model, or stronger, or shorter. For this you can use the Physical menu. There are the following options, Normal, Skynny, Strong, Young, Tall, Short and Custom. The Normal option will insert the items with the normal properties of the standard model of the program, the others will follow standards adapted for the different types of physique. The Custom option will insert the item according to the values established in the fields on the side following the following legend:
x = horizontal position, y = vertical position, w = width, h = height and º = rotation.
When choosing a physical type, the next items to be inserted will respect the selected option, to change items that are already on the stage, use the button next to each option.
4 - Modify Menu
We've already explained some buttons on this menu in the basics, so let's move on to the other features.
4.1 - Modify Fields
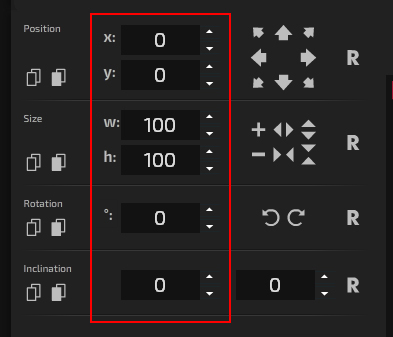
Note that as you change your item, the fields in the Modify Menu change their values. These are the numerical values for the changes you make. You can also modify the values here by typing or clicking the little arrows next to each field to increase or decrease the modification values.
By default all items start at zero horizontal (X) and zero vertical (Y) position, so don't worry if negative values appear in the position fields. The width (W) and height (H) refer to a percentage, with 100 (%) being the original size of your item. The rotation (º) is measured in degrees, going from 0 to 360 - the value can exceed, but the visual aspect is the same as it would be the equivalent of a complete turn. The skew is also measured in degrees.
4.2 - Invert Items
Still in the Modify menu we have the Invert buttons, they invert and reverse the selected item horizontally and/or vertically.

4.3 - Copy Values
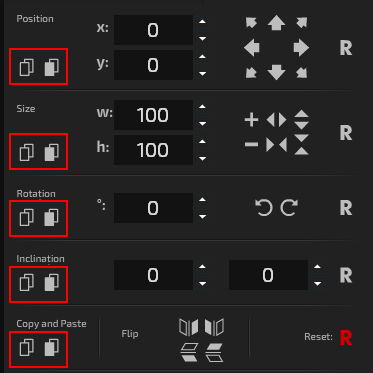
There are still buttons next to each type of modification, they are for copying and pasting values, in case you want to get values from other items.
4.4 - Sort the Items
To the right of the modify menu is the Layers area. All items placed on the stage are arranged in layers, one on top of the other.
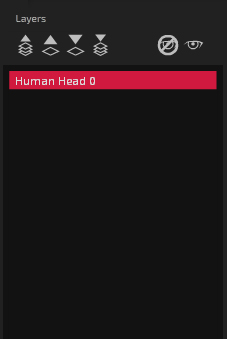
The Layers menu basically serves to order the visualization of items on the stage. As they are created, the items are overlapping the others, the newer, the further ahead of the others it will be, to order them, we will use the buttons above.
The first button "raises" all layers, leaving the selected item in front of all others. The second button "up" a layer, ie it brings the selected item forward one step.
The third button "down" one layer, taking your item back one level. The fourth and final button "down" all layers, leaving the selected item behind all others.
You can also select your item from the layers menu just by clicking on its name in the layers.
Above the layers menu there are two more buttons, Hide and Show Item, useful if you want to hide some items in order to better visualize what you are creating.
4.5 - Mask Items
Masking items, this is a step that requires a lot of attention from the user, as it is quite complex to do, so let's take it easy so as not to scare anyone, right? I'll give an example to help, first look at the image below:
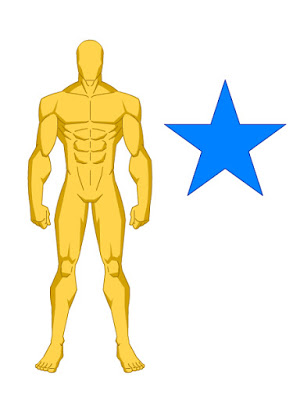
We have a yellow body and a blue star. What I want to do is "mask" the star in the body, that is, I want to put the blue star inside the yellow body, how do I do that? Simple.
First let's define a few things. The item that will be the external form, which will give the form to another item, we will call it "External Item". And the item that goes "inside" the shape will be called "Internal Item", ok? In this example the yellow body will be the External Item and the blue star the Internal Item.
In our Mask menu we have the fields referring to the External and Internal Items, the External Item field will always mark the item that is currently selected as the current item.
To define what the Internal Item will be, click on the item you want to insert and then on the Mask button:
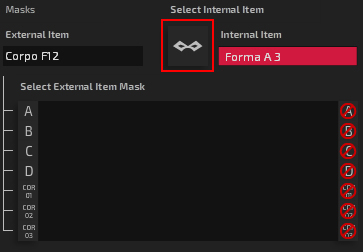
Remembering that the Internal Item is the blue star (Forma A 3) and the External Item is the yellow body (Corpo F12). To mask now just click on one of the 7 buttons: A, B, C, D, Color 01, Color 02 or Color 03.
These are the buttons referring to the External Item masks. You can mask up to 7 Inner Items per Outer Item, always using one per button. The first 4 options (A, B, C and D) are masks with the total format of the External Item, while the other 3 (Color 01, 02 and 03) are masks with the formats of Color Areas 1, 2 and 3 of the Item External, respectively.
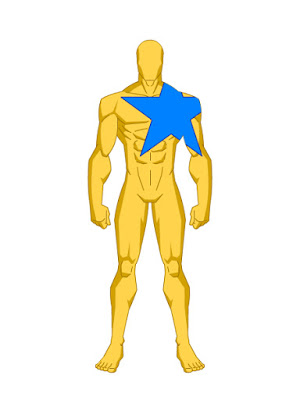
See how the item with the star in the mask A, of the yellow body, turned out. Remember: ALWAYS select the External item before clicking buttons A, B, C etc. or your Inner item will be masked elsewhere. Just below the buttons A, B, C etc. there are 7 other buttons that cancel the mask, removing the Internal Item from within the External Item (whichever is selected).
Attention: pay attention to the following tips for the mask system to work and correctly open your saved characters.
- Before deleting an inner (masked) item, ALWAYS REMEMBER TO REMOVE IT from the outer (mask) item first.
- NEVER use the same inner item on two different outer items. First remove it from the external item to only then place it in another.
This way your files saved with masked items will open normally.
5 - Coloring Menu
We've already introduced some features of this menu, so let's move on to the rest.
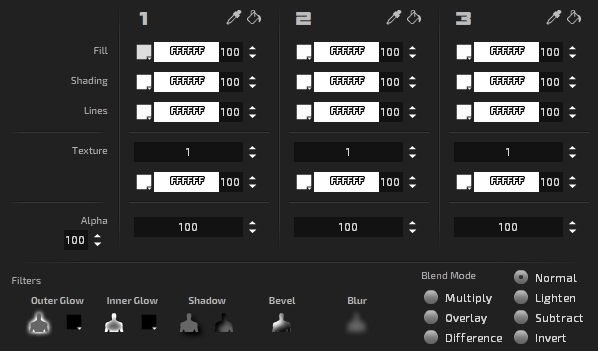
For each of the 3 item colors, there are a few more coloring options. Following the image above we have: Fill Color, Shade Color and Line Color.
Each of them comes with a code field (to enter the color value), an opacity field (100% for a solid color and 0% for full transparency). Just below the main palettes we have the field for sealing the Texture and also for the color of this texture. The opacity field controls the total opacity of the item.
We also have buttons that were created so you can copy a color from a certain item so it can be used on another. Eyedroppers can copy only that specific color. The paint cans will implement the copied colors in the selected item.

At the top of the Coloring Menu we have the following options:
- Color Preview: turns color preview on or off, with preview on the item is "painted" as soon as you hover over the color palette;
- Palette Type: we have the selection of two color palettes - A for a more complete palette and B for a more simplified palette (this one, original from previous versions of FH).
- Copy Colors: these two buttons copy and apply ALL colors at once, instead of copying by area.
5.1 - Filters and Blend Mode
At the bottom of the Coloring Menu you will find the filters and Blend Mode section. Here you can apply a shadow, glow or blur effect on your item, you can combine them and place more than one.

Clicking on a filter option you will automatically implement it on the selected item. Some filter types even have a color option with a palette available. This functionality is not yet 100%, so the colors of the Outer Glow and Inner Glow filters are not saved.
Clicking on a Blend Mode selection will implement it on the selected item. To reset, just select the "Normal" option.
5.2 - Reference
This is the part of the menu to open reference images for your project. Here it is also possible to copy the colors that are in the reference image.
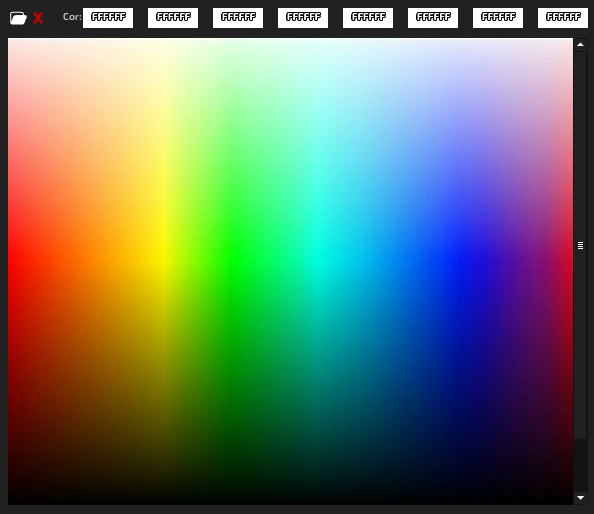
By default, the FH will show a color palette as a reference so that you can select colors, but you can load any image that is on your computer by clicking on the first button at the top left:
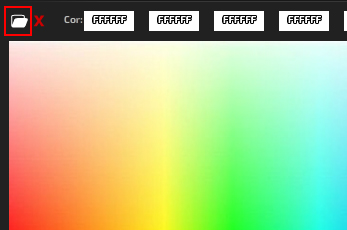
Once clicked, just browse and select the image saved on your computer and use it as a reference. To clear the reference and return to the default palette, click the red "X". To get some color from the image, click on the image and the color fields will automatically show the colors.
6 - Tools menu
This is the menu that has some extra features of the program that are also very important for the creator.
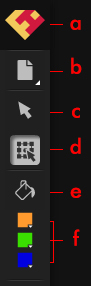
In the first part of the menu we have the following tools:
- a. Credits: opens the program credits including who produced and who supported;
- b. File: opens the file menu, we'll see the options later;
- c. Selection Tool: selects the item cleanly, without the transform tool enabled;
- d. Free Transform: enable free transform tool with grips to modify items;
- e. Paint Bucket: enables the paint bucket tool to paint items with one click:
- e. Quick Colors: paints items without having to open the Color Menu.
6.1 - File
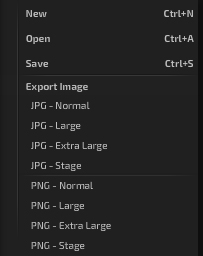
In File, we have functionalities related to saving and opening files:
- New: opens a new file for a new creation;
- Open: opens a previously saved .fh file;
- Save: saves the working file in .fh format;
- Export Image: exports the character in image format, selecting the file size and format. To save with a transparent background, select an option in .png.
6.2 - Stage View
In this second part of the Tools menu, we have several buttons for viewing the stage:
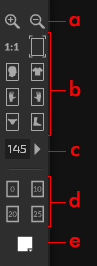
- a. Zoom In or Out: zooms in or out of the stage view;
- b. Focus buttons: these buttons adjust the stage view to the following sizes - Zoom 100% | Fit to Window | Face Zoom | Chest Zoom | Left Hand Zoom | Right Hand Zoom | Waist Zoom | Foot Zoom.
- c. Stage view size: indicates the percentage of the view from the default size;
- d. Grid: these buttons show different types of rulers and guide lines;
- e. Stage Color: this palette changes the color of the stage sheet.
6.3 - Help Menu
On the Help tab you will find:
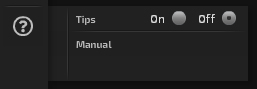
- Tips: are the little hint balloons that show the names of menus, buttons and also keyboard shortcuts for features.
- Manual: Opens this manual.
7 - Shortcut List
The following is the list of FH shortcuts:
- Ctrl + N : New File;
- Ctrl + S : Save File;
- Ctrl + A : Open File;
- Spacebar + Click and Drag: moves the stage;
- Spacebar + Mouse Scroll: increases or decreases the stage view;
- Shift + +: Zoom In;
- Shift + -: Zoom Out;
- Shift + 0: Zoom 100%;
- Shift + Home: First Item;
- Shift + →: Next Item;
- Shift + ←: Previous Item;
- Shift + End: Last Item;
- Shift + C: Clone Item;
- Shift + Del: Delete Item;
- Shift + 8 or ↑: Move Up;
- Shift + 9: Move Up Right;
- Shift + 6 or →: Move Right;
- Shift + 3: Move Down Right;
- Shift + 2 or ↓: Move Down;
- Shift + 1: Move Down Left;
- Shift + 4 or ←: Move Left;
- Shift + 7: Move Up Left;
- Shift + 5: Reset Position;
- Shift + Q: Increase Item;
- Shift + W: Decrease Item;
- Shift + E: Stretch Vertical;
- Shift + R: Press Vertical;
- Shift + T: Stretch Horizontal;
- Shift + Y: Press Horizontal;
- Shift + A: Rotate Counter-Clockwise;
- Shift + S: Rotate Time;
- Ctrl + PageUP : Move All Layers Up;
- Shift + PageUP: Move Up a Layer;
- Shift + PageDown: Down One Layer;
- Ctrl + PageDown: Move All Layers Down;
8 - Insert External Images
The user can insert external images in their creations, either to use their own item (something that does not exist in FH) or to facilitate their creations.
This is a bit of a complicated process that requires more attention from the user, so let's take it easy to learn.
Within the "Extras" group there is the "Image" sub-group, as shown in the following figure:
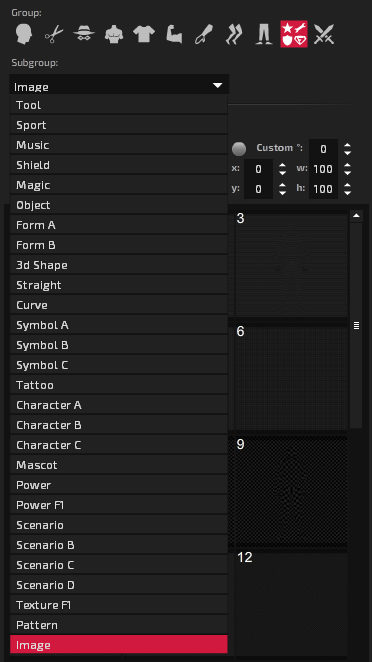
When selecting it, images will appear available for the user to insert in their creation in the place of the items. There are currently 50 spaces for images. These spaces are, by default, filled with "textures", but these can be replaced by images that the user wants to insert into the program.
To change these images, the user must go to the folder where the FH is on his computer and open it. The following folder structure will be displayed:
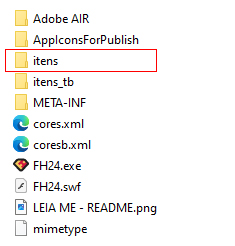
Opening the "itens" folder, the user will see these two folders (in addition to other files that are the FH items), then open the "imagens" folder:
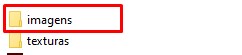
Inside this folder will be all the images that can be inserted in the FH.
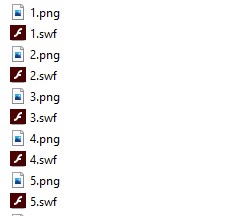
So just replace any of these 50 images, and it will be available in FH following the following rules:
- 1 - The image must be PNG. No other type of image will work, not JPG, not GIF, not another type. PNG only.
- 2 - The image must be renamed to the number you want to replace, from 1 to 50. Examples: 1.png, 7.png, 45.png, etc.
- 3 - If the image doesn't have a transparent background, it won't have it in FH either, so check first if the background of the image is transparent.
- 4 - When coloring an image via FH, the image will be completely in the chosen color.
- 5 - Masks don't work. You can't "mask" an item in an image, BUT you can "mask" an image in an item.
- 6 - Always save your images, because with each new version of FH they will need to be inserted into the folders again.
- 7 - NEVER overwrite another file type, just overwrite the images! The other files are important for the functioning of FH, so don't change them! If so, redownload the latest version.
After replacing the image in the folder, just open the FH (if it is already open, close and open it again, to reload the images) and the new images will be in place of the old ones.